Perhaps the most common question we hear from our customers is, “How long will my probes last?”. The best answer we can give is that it depends on many factors. While applications vary widely, extreme testing conditions may exist. Some test probes may be cycled once on clean contacts and maintained in the compressed position, while others on a high volume production assembly line may experience much higher cycles.
The published mechanical life and resistance data for a probe is based on both the fatigue life of the spring and the internal sliding contact surfaces when cycled in a controlled laboratory test environment. However, in an actual production environment, a test probe will typically encounter many conditions that will affect probe life.
Here are several important factors that should be considered:
Test Application – Measurement sensitivity is a critical factor when considering probe performance. For example, probe life may be much longer on a less sensitive measurement. Tests requiring high current need probes manufactured from materials that can carry high amperage. For targets with closer than average centers, this forces the use of smaller probes which are more fragile, have lower current ratings, and may have a shorter cycle life than larger probes.
Board Manufacturing Processes – There are a variety of board manufacturing processes that play a significant role in the ultimate cost of a test. It has become commonplace to use a no-clean process, which can leave everything from gummy residues to brittle contaminants affecting a probe’s contact reliability. Careful selection of tip styles and spring forces must be considered when contacting these difficult test targets.
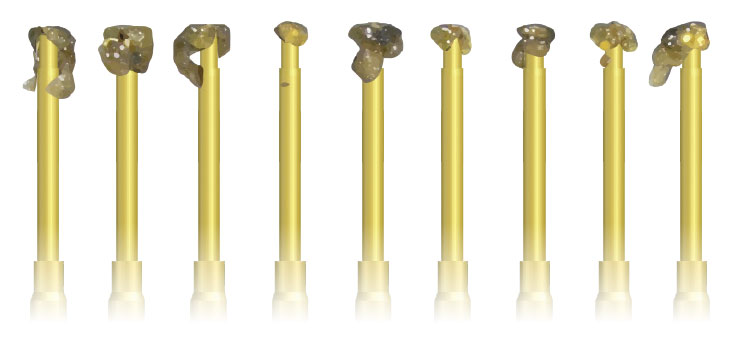
Test Environment – Flux residues can range from very hard to wet and gummy depending on temperature and humidity levels. These flux residues can slowly build up on the tips of the test probes causing false failures resulting in no defects found (NDF). This effort to diagnose and retest boards with these false failures increases your company’s total cost of test. Testing in extreme high or low temperatures can reduce probe cycle life significantly. In cold temperatures, a probe’s lubrication may thicken, preventing the plunger from returning to full height. In extreme heat, the lubrication and/or the spring material may be compromised, causing premature probe failure.
Board Manufacturing Materials – The introduction of manufacturing processes which leave a difficult to probe coating or residues on the board can add complications for testing. Matching the best probe and tip style to the materials and finishes of the test targets is critical for a reliable test and for extending probe life.
For example, while organic solderability preservatives (OSP) can protect boards from oxidation, this protective layer can cause significant problems at test. Because reliable testing requires a good contact between the test probe and the test target, a combination of steel tip material, razor style tip design, and higher spring force will break through the coating, extending the probe’s life.
Applying pin testable solder paste to test targets is recommended to provide the most reliable, highest yielding contact surface.
Fixture Design – Fixture design and construction will greatly affect a probe’s performance. Probes that are out of alignment will quickly wear out.
- Producing fixture plates with accurate hole sizes, positions, and straightness will improve the installation, wiring, and accuracy of sockets and termination pins.
- When using a guide plate for small targets or close centers, proper alignment will minimize excess wear on the side of the plunger or damage to the probe tip.
- Socket/termination pin set height is also critical for probe performance and longevity. QA probes are designed to operate at a working stroke, typically at two third stroke. When set too low, the probe is under stroked, reducing the contact force and the ability to penetrate surface contaminants. When set too high, the probe is over stroked, which may result in spring failure and potential damage to the unit under test (UUT). Use QA indicator probes to measure the deflection amount and ensure probes are operating with the correct working stroke in your fixture.
- When designing a fixture, proper selection of spring force is important. Several factors such as total collective probe force, condition of the contact surface, contact density, board stops, and support pins all must be considered.
- Using the correct probe installation tool will avoid damage to the tip. A harder tool can cause the tips to deform or even break, directly impacting the probe’s effectiveness.
Probe Selection – QA offers a wide range of tube, spring, and tip options to ensure the best possible probe choice for a specific application, environment, manufacturing process, and test target.
- The tube material and plating are important factors that influence the resistance and current rating of a probe.
- QA springs are made of music wire or stainless steel and are designed to maximize cycle life for a given force.
- Selecting the right tip style, size, and material for the target is critical for reliable contact.
- There are significant differences between lubricated and non-lubricated probes. QA probes are lubricated to maximize cycle life and performance. Unlubricated probes are available options if required.
- An effective method for maximizing probe life is to select QA’s socketless X Probe® design, delivering the same performance as conventional ICT probes while offering additional benefits. Using larger, more robust probes on smaller centers will generate better pointing accuracy, less sideloading, an increased spring force, and tip style selection.
Care and Maintenance – Improved test yields and reduced downtime are the rewards for keeping fixtures and probes in top condition.
- Good maintenance begins with careful storage. Leave probes in their original packaging to protect them from damage.
- Clean probe tips, remove lint, fibers, and other contaminants by gently brushing the probe tips with QA’s natural fiber brush and vacuum away the dislodged particles. Never use cleaning solvents. They will wash away the internal lubrication and potentially cause debris to wash inside the probe, causing reduced performance or shorter life.
- Diagnosing contact problems as they arise and replacing test probes one at a time is more expensive than replacing probes on regular intervals. A preventive maintenance program for fixtures can reduce downtime and lower the overall cost of test.
Identifying When to Replace a Probe
Probe wear is inevitable. Knowing when to replace a probe at the right time makes testing more reliable while reducing the chance of false failures and lost rework expenses. Here are some common signs that a probe needs replacing:
High Electrical Resistance
- Contamination buildup on the probe tips or the UUT can form an insulating layer and prevents reliable contact. This contamination comprises flux residue, solder oxides, and particulates from the contact surface. Also, fibrous contamination from clothing, gloves, or the recently sheared PCB material.
- Damage to the probe tip plating allows formation of oxides on the plunger base material. This effect is compounded in fixtures that sit idle for extended periods in humid environments.
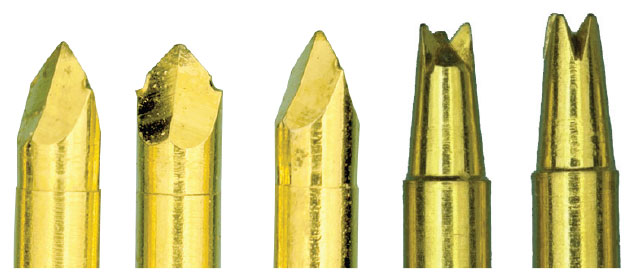
- Damaged probe tips no longer create pressure high enough to make reliable contact. Tips are commonly damaged by improper installation, bottoming during use, or lateral motion between the tip and the UUT.

Internal Wear
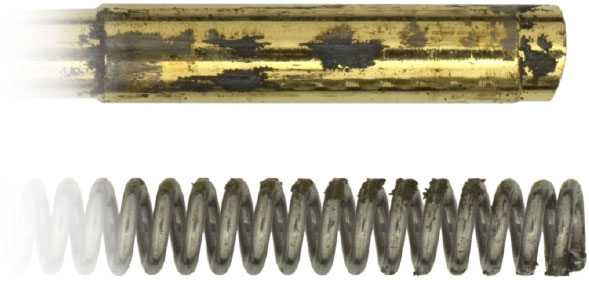
- Plating wear on internal contact surfaces is caused by extended cycling or sideloading the plunger (contacting angled component leads with crowns, contacting misaligned open vias with chisels, etc.).
- Dirty plungers could potentially move contamination onto the critical internal contact areas.
Spring Failure
- Spring failure can occur when probes are used beyond their working stroke and rated cycle life. Indications of spring failure to look for are: plungers that no longer return to full height, reduced spring force, or broken spring coils that compromise the full stroke capability of a plunger which may cause damage to the UUT.
- Temperature relaxation happens when springs are exposed to temperatures greater than 120°C for music wire and 204°C for stainless steel for extended periods.
Video
More details can be found in our video "7 Factors that Affect Probe Life".
