
Ensuring that you install sockets and probes correctly provides the best pointing accuracy, retention force, and overall performance. Be sure to select the appropriately sized tool for the product you are using.


Check that the mounting hole is sized correctly with the proper pin gauge (PG) tool. The RED side should not enter the hole, while the GREEN side should slide into the hole confirming that the hole size is correct and ready for the socket.
When drilling laminates such as AT7000 and G10/FR4, there is usually a difference between the drill diameter and the actual measured diameter of the finished hole. Drill feed, spindle speed, and material affect choice of the proper diameter drill. QA Technology recommends solid carbide, printed circuit board drills with 1/8” shanks. For 025-16 series sockets, homogeneous plate materials such as Lucite®, Nylon, or Delrin are recommended options.
Insert the socket in the mounting hole with the termination side down. The socket should slide easily into the hole until the press ring contacts the top surface of the mounting plate.
If you are using 025-16 sockets with pre-attached wire in multi-plate fixtures, slide the socket threading (ST25) tool, reduced end first, into the plates until it is flush with the top plate. Then feed the 1.0 [25.40] long stripped end of the wire into the tool until it protrudes from the reduced end. Pull the wire through with the tool and slide the socket into the mounting hole.

Insert the nose of the socket installation tool (ITR or ATR) over the top end of the socket and lightly tap it with a small hammer (THM-1) until the nose of the tool contacts the mounting plate. Take care not to damage the mounting plate. Sockets installed with several light taps will have at least double the pushout force of sockets installed with a single blow.
For 025-16 sockets, push them flush with a small press or other controlled method such as a hard, flat pusher and apply force perpendicular to the mounting plate.
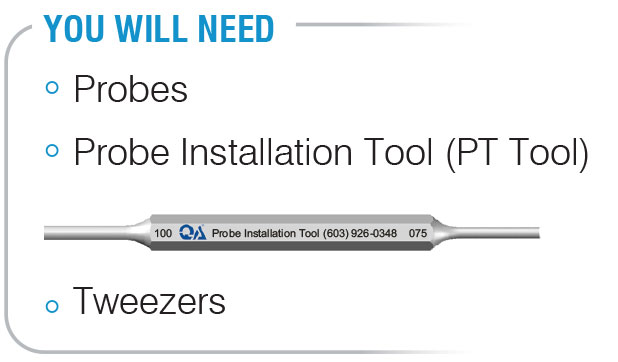
It is important to use our probe installation (PT) tool to prevent damage to the sharpest of tip styles. Do not use a metal object as a pusher because it will damage the tip and plating on the plunger.
Place the probe into the socket by hand or with tweezers, avoiding the mouth area at the top of the probe tube.

Push straight down with our probe installation tool (PT) until the probe is seated in socket.

There are times when you will need to replace a worn or damaged probe. Here a few simple steps for this process. The most effective methods are:


For headed probes, slide the hook of the probe extraction tool (PERX) under the head and pull straight up to remove the probe. For headless probes, use needle-nose pliers.
If a plunger comes out or if it is broken off and leaves the probe tube and spring behind in a socket, you can remove it without damaging the socket. Always remove the remaining components such as the plunger or spring with needle-nose pliers to begin with any of the following options:

Use needle-nose pliers to remove any of the remaining components,such as the plunger or spring, from the broken probe.
Insert the tube extraction tool (TERX) into the broken or damaged probe tube. If the probe tube has become deformed, you can also use this tool to reform the tube. Push firmly into the probe tube, taking care not to push so hard that the socket will move, then pull the broken tube out.
If this tool is not available, we recommended a few other options:
Insert a plunger, point end first, or insert a buss wire into the damaged probe.
Solder the plunger or buss wire into the broken off probe tube. Be careful not to solder the probe tube into the socket. In some cases where the tube does not allow you to install a plunger, use a pointed awl or needle to reform the tube.
Pull the damaged tube from the socket with needle-nose pliers.
Using a small pin vise and the proper size drill bit*, insert the drill bit straight down into the broken probe tube and twist it.
* Drill Bit Sizes:
039/X31 = Method #3 is not recommended as standard drill bits are not readily available
050/X39 = #70 Drill bit (.0280) [0.71]
075/X50 = #66 Drill bit (.0330) [0.84]
100/X75 = #57 Drill bit (.0430) [1.09]
After a few rotations with the pin vise and drill bit, pull straight up. The drill bit will grab the ID of the damaged tube so that you can pull it straight out of its socket.
Extracting sockets on closely-spaced grids is a delicate process. Take care not to damage neighboring probes and not to enlarge the mounting hole. It may be necessary to remove probes from adjacent sockets to allow clearance for the tool.

Identify the socket from the bottom and move adjacent wires and components.

We recommend that you set the socket flush to avoid further damage or having it become wedged into the hole. Insert the nose of the flush installation (ITR-FL) tool into the socket and lightly tap until the nose of the tool sits flush with your mounting plate.
For 025-16 series sockets mounted in acrylic or similar plastics, you can remove the socket through the mounting plate by gently pulling on the pre-attached wire or body of the socket with needle nose pliers. It is often better to leave the probe in the socket if you are pulling on the socket with needle nose pliers because the probe helps the socket to resist crushing. If the wire is missing, you can push straight down on the back of the socket with a flat pusher, forcing the socket up through the mounting plate. You can also use a 0.021 [0.53] diameter gauge pin. Place it on top of the socket and gently push or tap the socket out.

Insert the nose of the socket extraction (ETR) tool, tapping it lightly several times until the damaged socket drops out the back side of the mounting plate.
There are situations where it is not possible to remove the socket by driving it through the mounting plate with our extraction tools, such as in a wireless fixture, in limited access areas, or when the socket is damaged.
You can also remove from the top by using the buss wire soldering technique described previously for damaged probes. If the socket is not set flush, use the vise technique.
Remove sockets from the bottom by pulling carefully with needle-nose pliers. The socket tube will be crushed, but it will retain enough strength to allow it to be pulled out. Headless probes need not be removed first. Doing so will make the job easier since the spring inside reduces crushing of the socket tube and it will come through with the socket. Probes that are headed must first be removed from the top.
QA sockets with tailpins may be pulled out by the tailpin since the joint between the socket tube and the tailpin is stronger than the tube itself.
You can also remove sockets from the top by soldering a piece of buss wire along the outside of the socket, then pulling on the wire to remove the socket. Special soldering fluxes are available for soldering to the Stainless Steel sockets.
You can push sockets out from the bottom by snipping off the tailpin and driving the socket out with a hammer (THM-1) and small metal pin. A small countersink on the end of the pin makes it easier to keep it aligned.
Instructional video on how to install sockets and probes.